
The Venture 22 foot sailboat I call home was never meant to be a “liveaboard.” At best, the designer saw it as a daysailer capable of taking a very compatible couple for an occasional gunkholing weekend. Literally thousands of them were built. The reasons why I live aboard the boat full time at anchor has nothing to do with today’s story.
The boat I bought is over 30 years old and, like all boats it had problems with leaks. Fortunately NOT leaks in the hull since there are no through-hull fittings like sea cocks. But there were leaks where the chain plates pierced the cabin top. Those were easily taken care of with the judicious application of caulking.
The most serious offender was the sliding hatch at the entrance to the cabin from the cockpit. Rainwater would seep underneath the flange at the rear of the hatch and, when closed up, as one must do when it rains, water would find its way to into the cabin and drip down onto the cushions I sleep on.
In the last year and a half I’ve tried several different ways to thwart the problem. The most successful was covering the entire pop up top (a device to provide standing headroom which I don’t employ.) with plastic sheeting, generically known as “Visqueen” to boat yard workers, and fasten it down with duct tape. It worked, but cosmetically it looked like crap and the Visqueen had to be replaced every couple of months as the sun’s ultraviolet rays degraded it.
After endless hours of contemplation sitting in the cockpit I think I’ve finally got it conquered!
I bought four 1”X4” boards. On edge they give nearly an inch of clearance for the hatch to slide beneath. After cutting three of them to size I screwed them to the teak rails the sliding hatch rides under. I needed a piece of plywood to cover the area, but
Since I depend on buses for transportation I’m limited in what I can carry at one time. So at first I covered it with Visqueen. It worked fine proven by the hours of hard, pounding rain we got last week.
I went to Home Depot the day before Christmas and got them to cut me a piece of ½” plywood a bit oversized for the gap. When I got it screwed down I discovered that I should have coughed up a couple of more bucks and gotten a ¾” piece as what I’d purchased sagged down and lay on top of the hatch.
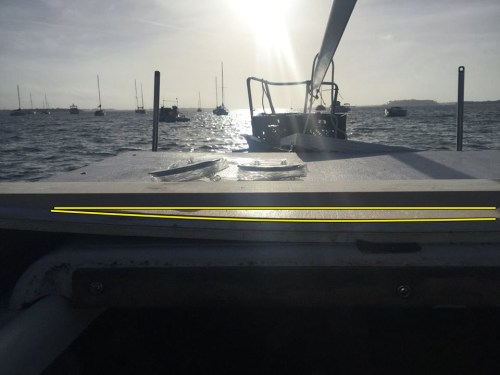
But someone whose resourceful Yankee roots extend as far back as 1630 the solution was close at hand. I had a six foot piece of that 1X4 board left so I cut it down to the width of the gap, laid it on end and glued and screwed it to the plywood. You’re not going to get THAT to bow. So now there’s a ½” space between the top of the hatch and the bottom of the plywood cover. Just need a little caulking to make sure there’s no intrusion and a bit of paint to make it look nice and I’m done. Those black patches are the hard part of Velcro. They work great for grabbing ahold of mosquito netting when you need it. Just touch the netting to the spot and it sticks.
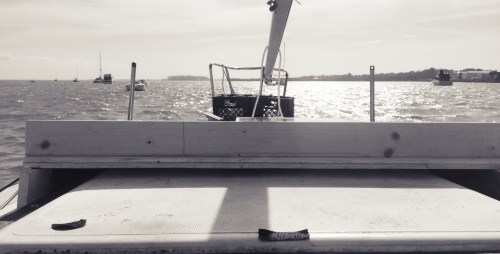
The final touch, though, was to fasten the solar panel to the new top. It had simply been laying on deck before though secured to the mast step with a cable lock to prevent theft. Now it won’t blow away or be rocked off the deck into the water. Came close to that once before, though.

In all it took me about an entire eight hour working day to get it built. The problem is, when you’re an old duffer with serious COPD things take longer. Tasks that shouldn’t be a problem leave me winded and in need of a breather. And it’s slow because being aware of how easily I get out of breath each step has to be thought out before actually doing it.
The new addition to the boat ISN’T quality work. My defense is: “It’s not an effin’ yacht, ya know….”

